Добро пожаловать! Debian официальный сайт на русском
Добро пожаловать! - Debian Help
На этом сайте представлены легкие и простые инструкции и подсказки для пользователей Debian, как начинающих, так и продвинутых.
Немного о Linux
Linux - это бесплатная, основанная на Unix, операционная система созданная Линусом Торвальдсом в содействии с разработчиками со всего мира. Разработанный под лицензией GNU General Public License, исходный код Linux доступен всем бесплатно.
Структура Linux
Структура Linux имеет четыре основных компонента:
- Ядро Linux
- Организация файловой системы
- Многопользовательская концепция
- Графическая система (GUI)
Краткая история Debian Linux
Debian был основан в 1993 году Яном Мёрдоком, будущим студентом Университета Пердью, которым был написан Манифест Debian призывающий создать дистрибутив Linux, который бы поддерживался в открытой манере в духе Linux и GNU. Он выбрал имя дистрибутива объединив первые буквы имен его подружки Debra и его собственного Ian, образовав Debian, которое произносится как Дебиэн.
Проект Debian по началу рос медленно и выпустил первые версии 0.9x в 1994 и 1995 годах. Первые портирования на другие архитектуры были начаты в 1995 году и первая версия Debian 1.x была представлена в 1996 году. В 1996 году, Брюс Перенс заменил Яна Мердока в качестве лидера проекта. По предложению одного из разработчиков Иана Шусслера, он направлял процесс правки Debian Social Contract и Debian Free Software Guidelines, определяя фундаментальные изменения в разработке дистрибутива.
Брюс Перенс покинул организацию в 1998 году перед релизом первой версии дебиана, основанной на glibc, 2.0. Проект инициировал выборы новых лидеров и выпустил два новых релиза ветки 2.x, каждый из которых включал больше портов и больше пакетов. APT был развернут в это время, а также было запущено первое портирование на не-Linux ядро (Debian GNU/Hurd). Первые дистрибутивы Linux, основанные на Debian (Corel Linux и Stormix's Storm Linux), были запущены в 1999 году. Не смотря на то, что они более не разрабатываются, эти дистрибутивы были первыми из многих дистрибутивов основанных на Debian.
Позже, в 2000 году, Проект сделал большие изменения в управление архивами и релизами, реорганизовав процессы архивирования софта с новыми "пулами пакетов" и создав тестовую ветку, как разрабатываемую, относительно стабильную основу для будущего релиза. В 2001 году, разработчики начали проводить ежегодную конференцию, известную как Debconf, с обсуждениями и мастерклассами для разработчиков и технических пользователей.
Релизы Debian
Милой частью релизов является то, что их имена взяты из фильма "История игрушек" студии Pixar. Звучит немного по детски, но нам это нравится!
| Релиз | Дата релиза | Кодовое имя |
| Debian 9.0 (Latest Stable) | 17 июня 2017 | Stretch |
| Debian 8.0 | 25 апреля 2015 | Jessie |
| Debian 7.0 | 4 мая 2013 | Wheezy |
| Debian 6.0 | 6 Февраля 2011 | Squeeze |
| Debian 5.0 | 14 Февраля 2009 | Lenny |
| Debian 4.0 | 8 Апреля 2007 | Etch |
| Debian 3.1 | 6 Июня 2005 | Sarge |
| Debian 3.0 | 19 Июля 2002 | Woody |
| Debian 2.2 | 15 августа 2000 | Potato |
| Debian 2.1 | 9 марта 1999 | Slink |
| Debian 2.0 | 24 июля 1998 | Hamm |
| Debian 1.3 | 5 июня 1997 | Bo |
| Debian 1.2 | 12 Декабря 1996 | Rex |
| Debian 1.1 | 17 июня 1996 | Buzz |
| Debian 1.0 | Не был выпущен | - |
| Debian 0.93R6 | Ноябрь 1995 | - |
| Debian 0.93R5 | Март 1995 | - |
| Debian 0.91 | Январь 1994 | - |
| Debian 0.01 through 0.90 | Август - Декабрь 1993 | - |
Наверх
Опубликовано 21 June 2017
debian-help.ru
Курс для начинающих пользователей линукс
На этой странице я хочу сделать пополняемый курс для тех кто хочет начать пользоваться операционной системой linux но не решается. Я сам долго работал в операционной система windows с 2000 года. И вот с 2015 я решил в качестве основной системы использовать линукс, об этом я написал в статье о переходе на линукс. Linux интересная система но требует усилий для её изучения и понимания принципов работы. Не буду вводить в заблуждение никого. Эта система не простая. Изучать придется. Этим курсом я хочу показать, что линукс вполне можно использовать на домашнем компьютере для повседневных нужд.
В сети в основном встречается либо бесконечные обзоры дистрибутивов и новые иконки либо статьи для системных администраторов. Поэтому никаких обзоров очередной убунту не будет. В этих материалах я хочу показать линукс с точки зрения простого пользователя. Так, что если вы системный администратор или просто компьютерный гуру то ничего интересного в моих материалах не найдете.
Так же никаких откровений. Всю эту информацию можно почерпнуть в сети. В качестве примера будем рассматривать операционную систему Debian, официальный сайт debian.org. Она сложнее чем ubuntu и linux mint но стабильней. Требует достаточно долгой настройки. Я использую дебиан только на основной машине. На ноутбуках ставлю либо xubuntu либо manjaro. Итак вводные сделаны. Можно приступать.
Установка операционной системы Debian:
Перейти и установить
Настройка после установки:
1 Часть
- Настройка репозиториев debian
- Добавить пользователя в группу «sudo»
2 Часть
Установка программ
3 Часть
Установка дополнительных приложений для gnome 3
Как установить и настроить samba в Debian
получить доступ к общим сетевым папкам локальной сети
Внешний вид:
Установка тем для gnome 3
Установка рабочего окружения XFCE
Управление системой:
Работа с пользователями в системе с помощью терминала и графической оболчки
Резервное копирование:
Программа Back In Time
Я подготовил список самых востребованных команд терминала:
https://yadi.sk/d/5MX6QXFm3LkLHM
chuzhoy007.ru
Debian.pro
Эта статья — часть Большого Мануала по настройке lamp-сервера на debian.
Предыдущая часть цикла — Боремся с вирусней на сайтах.
Следующая часть цикла — Not yet published
Исторически большая часть вирусни для php занимается именно тем, что шлёт спам. Навскидку я бы оценил количество этой вирусни в половину от всей. Поэтому логгирование вызовов mail() сильно сокращает время на поиск активной части вирусни. Да и просто для дебага «почему письмо не шлется» удобно. Тем более, что в php с версии 5.3 всё же прикрутили неплохое логгирование, которое указывает конкретный php-файл и строчку, где был вызов. Но, сами понимаете, если бы всё было просто, статью писать я бы не стал. Лог-то прекрасно пишется, если просто включить настройку mail.log, но пишется он от имени пользователя, под которым запущен сам скрипт (соответственно, под апачем скорее всего www-data). А если каждый сайт под своим пользователем? Соответственно, все мануалы пестрят чем-то вроде «создайте файл /var/log/php-mail.log, сделайте chmod 777″. В принципе, незачем читать его кому-либо, кроме рута и группы adm, как это принято для всех логов, куда может попасть приватная инфа. Поэтому отправлять лог мы будем не в файл, а в syslog. Что характерно, официальная документация на php.net об этом не напоминает, да и вообще пришлось поискать, как такое сделать (сначала я пытался сделать mail.log = /dev/log). В итоге, конечно, ничего сложного. Сначала создаём каталог и файл для лога (вообще каталог не обязательно, я для аккуратности):
root@server:~# mkdir /var/log/php-mail/; chown root:adm /var/log/php-mail/; chmod 750 /var/log/php-mail/
root@server:~# touch /var/log/php-mail/mail.log; chown root:adm /var/log/php-mail/mail.log; chmod 640 /var/log/php-mail/mail.log
Далее заводим ini-файл для php, который включит логгирование (я пишу пример для apache, для fpm/cli просто положите по аналогии в соответствующие каталоги). Для php 5.X в debian файл следует поместить в /etc/php5/apache2/conf.d/90-mail-log.ini, для php7.0 — в /etc/php/7.0/apache2/conf.d/90-mail-log.ini, для 7.2 (если у вас пакет от Ondrej) — в /etc/php/7.2/apache2/conf.d/90-mail-log.iniСодержимое файла (можете, в принципе, вписать в сам php.ini, но это не всегда удобно):
mail.log = syslog
Далее настраиваем rsyslog (он стоит по умолчанию в debian, для остальных сами гляньте, как откладывать в файл строчки по вхождению), чтобы нужная нам информация попадала в отдельный лог. Кстати, сойдёт за пример, как писать отдельный лог для любых строчек с каким-либо вхождением (в данном случае — «mail()»). Например, в файл /etc/rsyslog.d/99-php-maillog.conf
Почти всё, остаётся только написать конфиг для logrotate, чтобы случайно не забить всё место. Ротировать будем при достижении файлом определенного размера (size 100M). Пишем, например, в /etc/logrotate.d/php-mail
/var/log/php-mail/mail.log { rotate 7 size 100M copytruncate create 0640 root adm compress missingok notifempty}
Всё, осталось только отрестартить нужные демоны:
root@server:~# apachectl restart
root@server:~# service rsyslog restart
Теперь у нас есть лог, в который могут писать любые сайты вне зависимости от пользователя, под которым сайт работает. Прочитать этот лог могут только root и пользователи группы adm, а сам лог изредка ротируется.Строчки в логе будут выглядеть примерно так:
May 22 14:27:49 dev apache2: [22-May-2018 14:27:49 UTC] mail() on [/home/dev2/data/www/some_file.php:18]: To: example@example.com -- Headers:
Статья обфусцирована, сами знаете почему. С начала прошлой недели у меня была идея-фикс. Поднять open<censored> сервер на территории матушки-России, подцепиться к нему по ipv6 с территории страны-агрессора, а v4-клиентами из RM -RF выходить наружу уже оттуда, откуда нужно. Ну то есть точка входа здесь, точка выхода там, а сами точки общаются исключительно по ipv6 (от [...]
Статью пишу «по памяти», воспроизвести вживую негде (да и лень). Если найдете ошибки и что-то не заработает — обязательно пишите. Я бы пока не рассматривал эту статью, как решение из разряда «copy-paste и работает». Но если вы понимаете происходящее ниже — то никакой проблемы запустить эту штуку нет, там всё банально. Ценность здесь, скорее, именно [...]
На фоне клёвых первоапрельских новостей многие могли пропустить весьма важную новость. Компания Cloudflare совместно с APNIC запустила новый публичный резолвер на адресе 1.1.1.1 Что вдвойне приятно — с поддержкой dns over TLS (то бишь запросы до этого резолвера можно шифровать). Так же есть поддержка DNS over HTTPS, но его использовать может пока только FireFox в [...]
Всем хороша связка rtorrent+rutorrent. Только настраивать её очень уж геморрно, да и уязвимость там нашли, помнится. Я давно уже использую deluge. Да и вообще мне интерфейс deluge-web больше нравится — выглядит посовременнее, сам он читаемый, да и вообще «не PHP и ладненько». Поэтому сегодня и расскажу, как настроить связку из deluged и родного вебинтерфейса к [...]
В некоторых следующих статьях помимо прочего придется запускать некоторые сервисы без «изкоробочного» init-скрипта или юнита. В 2018 году мне уже пришлось смириться с победой systemd и показывать в тех статьях init-скрипты я уже не буду. Но и рассказывать в каждой статье всю последовательность действий мне будет лень. Поэтому здесь я расскажу, что делать с unit-ом [...]
Сижу я в один прекрасный день, значит, смотрю на свою LTS-убунту на ноутбучке и понимаю, что несмотря на apt-get upgrade, сделанный полчаса назад, она всё ещё уязвима к spectre (не спрашивайте как, просто жопой почуял). Про сами уязвимости в процах, думаю, рассказывать в сотый раз не стоит, а вот про то, как linux-хост проверить на [...]
Для начала поговорим о том, для чего нужен локальный dns-резолвер. Вообще, полезен он и на сервере, и на вашем ноутбучке (только для разного, пожалуй), а написать эту статью меня вынудил именно новый провайдер (самизнаетепочему). Локальный резолвер позволяет получать мгновенный ответ от dns (кроме случая, когда мы впервые спрашиваем определенную запись). Резолверы провайдера/хостера бывают перегружены, запрос [...]
Одной из первых статей в этом блоге была статья Debian, ftpd, vtpd, vsftpd. Very fast way. Восемь, мать его, лет назад! Собственно, по той статье некоторое время назад настроить vsftpd в дебиане стало невозможно. Поэтому я решил написать новую. Формально статья могла бы стать одной из частей Большого мануала, но я очень не хочу, чтобы [...]
debian.pro
Frequently Asked Questions about Debian CDs
What is a CD image anyway?
A CD image is the exact representation of the data on a CD in a normal computer file, that can e.g. be transmitted over the Internet. CD burning programs can use the image files to make real CDs.
For a correctly written CD, the .iso file must not appear on the CD when you access it! Instead, you should see a number of files and directories - in the case of a Debian CD, this includes a dists directory and a README.html file.
The .iso format is roughly comparable to a .zip file: It contains other files and directories, and only these will appear on the final CD. Some archive programs allow you to unpack .iso files. Do not use this feature to create a CD from the unpacked files! The resulting CD will fail to boot because the .iso format includes special information related to booting from the CD, which is lost when you unpack the file. See below on how to correctly write a CD image under Linux, Windows or Mac OS.
My question is not answered by this FAQ!
If you cannot find an answer to your question here, you can ask for help on one of the Debian mailing lists. In all cases, you should search the mailing list archives before sending mail to the lists. You can subscribe to and unsubscribe from the lists. However, you do not need to be subscribed in order to send mail to the lists - if you are not subscribed, ask for replies to be CC'd to you.
Mailing lists relevant to problems with CD installation:
- debian-cd: Discussion about the CD image creation process, available CD mirrors, problems when booting from CD, announcements of new official images.
- debian-boot: A bit of a misnomer, this list actually covers the installation process; any problems encountered after successfully booting from CD may be more appropriate here than in debian-cd.
- debian-live: A list for the Debian Live project, focused on development of the software that is used to build Debian Live images, but also appropriate for discussion particular to using those images.
- debian-user: General support list for users of Debian. Focus is more on problems encountered after a successful installation, when using the system. There are also several lists for non-English speakers, in Català, Chinese, Dansk, Esperanto, Français, Deutsch, Magyar, Indonesian, Italiano, 日本語 (Nihongo), Polski, Português, Русский (Russkij), Español, Svenska, Türkçe, and Ukrainian.
Why should I use this jigdo program? I prefer a simple HTTP download!
Today, there are nearly 300 Debian mirrors (which contain the complete Debian distribution as .deb files), but far fewer machines serving Debian CD images. As a result, the CD image servers are constantly overloaded.
Additionally, nobody is very enthusiastic about setting up more CD servers because of the tremendous amounts of wasted bandwidth (some people keep restarting failed downloads instead of resuming from the point where the connection was closed) and because a regular mirror is more attractive (it allows continuous upgrades of Debian, or using the testing/unstable distribution instead of the stable one).
jigdo tries to make the most out of this situation, by downloading the data for the CD images from one of the 300 mirrors. However, these mirrors only hold individual .deb files, not the CD image, so some additional manipulation of the data is necessary to produce one big CD image file from the many small .deb files.
Do not be afraid to try out jigdo! The complex process of generating the CD image is completely hidden from you - instead, you benefit from the fact that one of the 300 Debian mirrors is bound to be nearer and faster than any of the CD servers.
Which of the numerous images should I download? Do I need all of them?
No. First, of course you only need to download CD or DVD or BD images - the three types of images contain the same packages.
Also, you only need the CD/DVD/BD images for your computer's architecture. The architecture is the type of hardware your computer uses. By far the most popular one is the Intel/AMD architecture, so most people will only want to get the images for i386. If your PC has a 64-bit AMD or Intel processor, you will most likely need the amd64 images (though i386 is also fine), the ia64 images will not work.
Furthermore, in most cases it is not necessary to download all of the images for your architecture. The packages are sorted by popularity: The first CD/DVD/BD contains the installation system and the most popular packages. The second one contains slightly less popular ones, the third one even less popular ones, etc. You will probably only need the first couple of DVDs (or the first few CDs) unless you have very special requirements. (And in case you happen to need a package later on which is not on one of the CDs/DVDs/BDs you downloaded, you can always install that package directly from the Internet.)
Please also read the next paragraphs to determine whether you want/need to download network install CDs, update CDs or source CDs.
What is a netinst or network install CD?
To quote the network install page: A network install or netinst CD is a single CD which enables you to install the entire operating system. This single CD contains just the minimal amount of software to start the installation and fetch the remaining packages over the Internet.
If you only want to install Debian on a single machine which has a fast Internet connection, the network install may be the fastest and easiest option for you: You only download the packages that you selected for installation on your machine, which saves both time and bandwidth.
What are the update CDs/DVDs?
Update CDs/DVDs are CDs/DVDs which contain all the packages that changed between a major release version (e.g. 7.0, 8.0, etc.) and a later point release of that stable distribution. For example, if you already have the full set of debian-8.0.0 CDs/DVDs, you can add the debian-update-8.2.0 disc set to turn this debian-8.0.0 set into a debian-8.2.0 set.
This type of CD/DVD is intended for vendors having large amounts of pressed versions of CDs/DVDs (which makes them cheaper than individually burned CDs/DVDs). If you order CDs/DVDs from such a vendor, it is possible that you'll receive CDs/DVDs for a slightly older point release, plus some update CDs/DVDs for the latest revision. This is a perfectly acceptable way of distributing Debian on CD/DVD.
Of course, this type of CD/DVD can also be useful to you as an end user; instead of creating the full set of CDs/DVDs for each new revision of a release, you only need to download and burn update CDs/DVDs for your architecture.
Note that update CDs/DVDs are not meant to boot, they just contain the packages needed to upgrade an existing installation. If you don't have that existing installation, then you'll need to use the normal installation CDs/DVDs. After the new system is booted, the updated CD/DVD can be added with apt-cdrom add.
Now, what if for some reason you do not want to download the update CD/DVD even though you already have the full set of CDs/DVDs/BDs for the previous revision? In this case, you should consider using jigdo's update feature: jigdo can read the contents of the old CDs/DVDs/BDs, download only those files that have changed for the new CDs/DVDs, and create the full set of new CDs/DVDs/BDs. Still, it will have done this by downloading only about the same amount of data as for an update CD/DVD.
What are the source CDs?
There are two types of images, the binary CDs that contain precompiled, ready-to-run programs, and the source CDs that contain the source code for the programs. The vast majority of people do not need the source CDs; you should not download them unless you really have a good reason for it.
Where is the CD image with non-free?
Debian has a quite strict view with regard to the licenses of software: Only software that is Free in the sense of the Debian Free Software Guidelines is allowed into the actual distribution. All the other, non-free software (for example, software for which source code is not available) is not supported officially.
The official CDs may freely be used, copied and sold by anyone anywhere in the world. Packages of the non-free category have restrictions that conflict with this, so these packages are not placed on the official CDs.
Sometimes, someone is kind enough to create unofficial non-free CDs. If you cannot find any links on this website, you can try asking on the debian-cd mailing list.
Are DVD images of Debian available?
Yes - Debian offers DVD images for the current stable release. Additionally, as far as we know, Debian is the only Linux distribution to offer weekly full-size DVD images for download! Because of their size, these images are distributed with jigdo.
What's the difference between official and unofficial images?
Official images are built by a member of the Debian CD team and have undergone some testing to ensure they work. Once they have been released, the images never change - if they turn out to be broken, a new set with a different version number is released.
Unofficial images can be built by anyone - CD team members, other Debian developers or even advanced Debian users. Typically, they are more up-to-date, but have received less testing. Some have new features (e.g. installation support for new hardware), or contain additional software packages which are not part of the Debian archive.
Is a Debian live CD available?
Yes. A so-called live CD, or more precisely, a live system, is a complete system prepared for a DVD, USB key or other medium. You do not need to install anything on the hard drive. Instead you boot from the medium (DVD or USB key) and are able to start working on the machine right away. All programs run directly from the medium.
The Debian Live Project produces live image files for a variety of system types and media.
The CD/DVD/BD fails to boot! / From which disc should I boot?
Only the first CD/DVD/BD in a set is bootable.
If your Debian disc fails to boot, first ensure that you have correctly written it to the medium - please see the explanation above. Additionally, please check whether your BIOS is set up to boot from your optical drive.
If your system cannot boot from CD/DVD/BD at all, it is also possible to boot from a USB stick or from the network.
Where are the images for M68K, Hurd or other architectures?
Depending on the state of support for a certain architecture, CD/DVD images are available from different places:
- If the architecture you are looking for is officially supported by the current stable release, see the Debian on CD page for the available download options.
- If a Debian port for an architecture exists, but has not yet been released officially, CD images may or may not be available. Again, see the Debian on CD page - in contrast to stable images, only one download option may be supported, so have a look at both the jigdo and HTTP sections.
- For the Debian port to the GNU/Hurd, see the page about unofficial Hurd CDs.
- Otherwise, check the Debian port pages for the architecture you are interested in.
Are images for the unstable distribution available?
There are no unstable full CD/DVD/BD images. Due to the fact that the packages in unstable change so quickly, it is more appropriate for people to download and install unstable using a normal Debian HTTP mirror.
If you are aware of the risks of running unstable, but still want to install it, you have a few choices:
- Install testing using a netinst image, then upgrade to unstable by changing the entries in your /etc/apt/sources.list. To avoid unnecessary downloads and package upgrades, it is advisable to install a minimal testing system first and only to install most of the software (e.g. desktop environment) after the switch to unstable.
- Use the stable installer to install a minimal stable system and then change your /etc/apt/sources.list file to use testing and do an apt-get update and apt-get dist-upgrade. Finally, install the packages you desire. This method is the most likely to work of those presented here.
- Be a tester of the testing installer and install testing using a netinst image, then upgrade to unstable by changing the entries in your /etc/apt/sources.list. To avoid unnecessary downloads and package upgrades, it is advisable to install a minimal testing system first and only to install most of the software (e.g. desktop environment) after the switch to unstable. Then apt-get update and apt-get -u dist-upgrade - then you have a sid release.
- Use a netboot mini.iso image. You will find it on any of the Debian mirrors under debian/dists/unstable/main/installer-*/current/images/netboot/mini.iso. During the installation choose Advanced options -> Expert install. In the step Choose a mirror of the Debian archive choose version sid - unstable.
Which CD/DVD/BD image contains package XYZ?
To find out which image contains a certain file, use the cdimage search tool. It has knowledge of just about all the Debian CDs/DVDs/BDs produced by Debian since the Woody release, covering all the official releases (both older archived releases and the current stable release) and the current sets of daily and weekly testing builds.
Can I have a list of all the packages contained in an image?
Yes. Look on cdimage.debian.org for the corresponding .list.gz file - it will list all the packages and source files included in the image. For Debian Live images, you can find in the same directory as the image files some similarly named files suffixed with .packages. Download these and then search them for the desired package name.
The software on the official CDs is outdated - why don't you release a new version?
We only make official releases of the stable distribution when we think they truly deserve that name. Unfortunately, this means that stable releases only happen about every 2 years...
If you require more recent versions of some of the software in Debian, you can install stable and then upgrade (via the net) those parts you want to the versions from testing - it is possible to mix software from the different releases.
Alternatively, try out the images of testing that are generated automatically every week. More information about testing security support is available from the security FAQ.
If you only need newer versions of specific packages, you can also try the backports service, which takes packages from testing and modifies them to work on stable. This option may be safer than installing the same package directly from testing.
How do I know if I am downloading the newest images?
The note at the bottom of the Debian on CD page always shows the version number of the latest release.
How can I verify the downloaded ISO images and written optical media?
Detailed information on how to authenticate the signed checksum files containing the checksums of the ISO image files is available on the authenticity verification page. After cryptographically verifying the checksum files, we can check that:
- Checksums of the downloaded ISO image files match those found in the checksum files. Computing the checksum of the ISO image files is performed by tools such as sha512sum and sha256sum.
- Checksums of already written optical media match those found in the checksum files. This is a slightly more difficult operation to describe.
The problem with the verification of written optical media is that some media types will possibly return more bytes than those found in the ISO image. This trailing garbage is impossible to avoid with CD written in TAO mode, incrementally recorded DVD-R[W], formatted DVD-RW, DVD+RW, BD-RE, and also with USB keys. Therefore, we need to read exactly the same number of sectors of data from the media as are found in the ISO image itself; reading any more bytes from the media will alter the checksum result.
- The isosize program can be used to find out the appropriate amount of bytes to be read from the optical media. It shows the sector count and the sector size from the optical media, where <device> is the device file of the loaded optical media. $ /sbin/isosize -x <device> sector count: 25600, sector size: 2048
- Then sector count and sector size are passed to dd to read the appropriate amount of bytes from the optical media and the byte stream is then piped to the appropriate checksum tool (sha512sum, sha256sum, etc). $ dd if=<device> count=<sector count> bs=<sector size> | sha512sum
- The computed checksum is to be compared against the corresponding checksum found in the appropriate checksum file (SHA512SUMS, SHA256SUMS, etc).
Alternatively, there is a useful helper script called check_debian_iso which can verify ISO image files and optical media, reading the appropriate amount of bytes from media then computing the checksum and comparing it against the checksum file.
- ISO image file verification. This will compare the checksum of the debian-6.0.3-amd64-netinst.iso image file against the corresponding checksum found in the SHA512SUMS checksum file. $ ./check_debian_iso SHA512SUMS debian-6.0.3-amd64-netinst.iso
- Optical media verification. This will compare the checksum of the media accessible as /dev/dvd against the checksum of debian-6.0.3-amd64-DVD-1.iso as found in the SHA512SUMS checksum file. Note that the ISO image file itself is not needed, its name is merely used to locate the corresponding checksum in the checksum file. $ ./check_debian_iso SHA512SUMS debian-6.0.3-amd64-DVD-1.iso /dev/dvd
Why is my downloaded DVD image smaller than 1 GB when it should be larger than 4 GB?
Most likely, the tool you use for downloading the image does not have large file support, i.e. it has problems downloading files larger than 4 GBytes. The usual symptom for this problem is that when you download the file, the file size reported by your tool (and the amount of data that it downloads) is too small by exactly 4 GB. For example, if the DVD image is 4.4 GB, your tool will report a size of 0.4 GB.
Some old versions of wget also suffer from this problem - either upgrade to a version of wget which does not have this restriction or use the curl command line download tool: curl -C - [URL]
How do I write an ISO image under Linux/Unix?
Note that Debian ISO images for i386, amd64 and arm64 are also bootable from a USB key; see below.
xorriso for all optical media types (also doable as non-root user): xorriso -as cdrecord -v dev=/dev/sr0 -eject debian-x.y.z-arch-MEDIUM-NN.iso In order to get the full nominal speed when writing to BD-RE (i.e. without the slowdown caused by the drive's internal defect management), add the option stream_recording=on.
growisofs for DVD and BD optical media types: growisofs -dvd-compat -Z /dev/sr0=debian-x.y.z-arch-MEDIUM-NN.iso
wodim for CD optical media type: wodim -v dev=/dev/sr0 -eject -sao debian-x.y.z-arch-CD-NN.iso
For Linux, there are also the X programs Brasero, K3B and X-CD-Roast, to name a few. Note that they're all frontends to the previously mentioned low-level burning applications.
Brasero Select the button Burn Image. Then click on Click here to select a disc image, browse and select your downloaded ISO file, check whether the settings under Properties are correct and choose Create Image. K3b Select the menu entry Tools - CD - Burn CD Image. In the dialog that opens, enter the path to the image in the Image to Burn field, check whether the other settings are correct, then click on Start. X-CD-Roast After the program has started, click on Setup and choose the HD settings tab. Copy the Debian CD image to one of the directories that are displayed in the table. (If the table is empty, enter the path of a directory you want to use for temporary storage, and click on Add.) Click on OK to exit the setup. Next, select Create CD and then Write Tracks. Choose the Layout tracks tab, select the line displaying the image filename and click on Add, then click on Accept track layout. Finally, click on Write tracks.How do I write an ISO image under Windows?
This might be a little problem on older versions of Windows, as many Windows image-burning programs use their own formats for CD images. To burn the .iso images you will most likely have to use a special menu. Look for options like ISO9660 file, Raw ISO image or 2048 bytes/sector. (Note: other bytes/sector values are fatal!) Some programs do not offer these choices; use another burning program instead (ask a friend or colleague). Here is some information about how to write CD images with specific products:
ImgBurn (Freeware) There are screenshots of how to write an image to CD/DVD CDBurnerXP Pro (Freeware) The process of writing an .iso image is described in the program's manual. ISO Recorder (Freeware) This program can write .iso images on Windows 2003, XP and Vista. Adaptec/Roxio Easy-CD Creator From the File menu, choose Create CD from image.... Then select the .iso file type, and the correct image. This opens up the CD creation setup GUI, from there ensure that all the information for your CD-R is correct. In the Create options portion, choose Create CD; under Write method, choose Track at once and Close CD. Nero from Ahead Software Disable the Wizard, then select Burn Image from the File or Recorder menu. Select All Files in the file selection window if necessary. Select the .iso file, click OK in the this is a foreign file dialogue box, in case one is displayed. In the option box that opens, the defaults should be okay: Data Mode 1, Block Size 2048, Raw Data, Scrambled, and Swapped not selected, and Image Header and Image Trailer left at 0. Click OK. Under Write CD or Burn, use the default options, e.g. Write and Determine maximum speed, plus check the Finalize CD option. CD Extreme from Sony Choose New Job... from the File menu. Then select Global-Image or Other Image. This opens up the CD creation setup GUI, from there manually enter the path to the .iso image or browse... using files of type other. From the Edit menu, choose Recoding Options, in the resulting Disk Image Options dialog, choose: Recording Type: Disk at Once (DAO) Closed Mode and Blocking: CD Mode1 (Blocking 2048)-DVDDo not check off Post-gap.... Microsoft Resource Kit Tools The command-line Resource Kit Tools are provided by Microsoft free of charge, they work with Windows 2003 and XP. Two programs to write images to CD and DVD are included, they are named Cdburn.exe and Dvdburn.exe. Usage of the programs is described in the accompanying help file - essentially, the command to be executed is something like cdburn drive: iso-file.iso /speed maxIf you can provide updated information or details for other programs, please let us know.
How do I write an ISO image under Mac OS?
The Toast program for Mac OS is reported to work fine with .iso files. You can be extra-safe by giving it the creator code CDr3 (or possibly CDr4) and type code iImg using e.g. FileTyper. Double-clicking on the file will then open up Toast directly, without having to drag-and-drop or go via the File-Open menu.
Another option is Disk Utility (included with Mac OS X 10.3 and higher): After opening the Disk Utility application (in the /Applications/Utilities folder), select Burn... in the Image menu and choose the CD image to burn. Ensure that the settings are correct, then click on Burn.
Another option is Disk Copy (included with Mac OS X 10.1 and higher): After opening the Disk Copy application (in the /Applications/Utilities folder), select Burn Image... in the Image menu and choose the CD image to burn. Ensure that the settings are correct, then click on Burn.
How do I write a CD/DVD/BD image to a USB flash drive?
Several of the Debian and Debian Live images, notably all i386, amd64 and arm64 images, are created using the isohybrid technology, which means that they may be used in two different ways:
- They may be written to CD/DVD/BD and used as normal for CD/DVD/BD booting.
- They may be written to USB flash drives, bootable directly from the BIOS / EFI firmware of most PCs.
On a Linux machine, simply use the cp command, to copy an image to a USB flash drive:
cp <file> <device>
Alternatively you can also use dd:
dd if=<file> of=<device> bs=4M; sync
where:
- <file> is the name of the input image, e.g. netinst.iso
- <device> is the device matching the USB flash drive, e.g. /dev/sda, /dev/sdb. Be careful to make sure you have the right device name, as this command is capable of writing over your hard disk just as easily if you get the wrong one!
- bs=4M tells dd to read/write in 4 megabyte chunks for better performance; the default is 512 bytes, which will be much slower
- The sync is to make sure that all the writes are flushed out before the command returns.
Additionally to the method above for Linux systems, there is also the win32diskimager program available, which allows writing such bootable USB flash drives under Windows. Hint: win32diskimager will apparently only list input files named *.img by default, while the Debian images are named *.iso. Change the filter to *.* if you use this tool.
Please note, that Debian advises not using unetbootin for this task. It can cause difficult-to-diagnose problems with booting and installing, so is not recommended.
How should I label the discs?
There is no obligatory way of labeling. However, we suggest you use the following scheme to ensure interchangeability:
Debian GNU/{Linux|Hurd|kFreeBSD} <version>[<revision>]Official {<architecture>} {CD|DVD|BD}-<number>
For example:
Debian GNU/Linux 6.0.3Official i386 CD-1
Debian GNU/Linux 6.0.3Official amd64 DVD-2
Debian GNU/Linux 6.0.3Official source BD-1
Debian GNU/kFreeBSD 6.0.3Official i386 Netinst CD
If you have enough space, you can also add the codename to the first line, as in: Debian GNU/Linux 6.0.3 Squeeze.
Note that you are allowed to use the Official designation only on CDs the image of which has a checksum that matches the one from the jigdo files of official releases. Any CD that has no matching checksum (e.g. your own creations) must be clearly labelled as Unofficial, for example:
Debian GNU/Linux 6.0.3Unofficial Non-free
In the case of official weekly snapshots, version numbers like 6.0.3 should not be used to avoid confusion with released Debian versions. Instead, label the image with a codename like etch or a distribution name like testing. Also add Snapshot and the date of the snapshot to help identify it:
Debian GNU/Linux etchOfficial Snapshot alpha Binary-22005-06-17
Is there any artwork for discs and covers?
There is no official layout for the cover, back and label of a Debian CD/DVD/BD, but a number of people have produced nice-looking images. Please see the separate artwork page.
Are old CD/DVD/BD images still available?
Some older images are available from the archive section on cdimage.debian.org. For example, you might want to try out older images if you need support for a certain (sub)architecture which has been dropped for a newer release.
Note that when you install using a really old CD/DVD (pre 4.0, Etch), the contents of /etc/apt/sources.list will reference the current stable Debian release by default. This means that any upgrade over the net will upgrade to the current stable release.
What is the best way of installing Debian on many interconnected computers?
If you want to install Debian on a large number of machines and then keep all these installations up-to-date (e.g. security updates), installing from optical media is not ideal, but then neither is installing via the Internet, because the packages will have to be downloaded again for each machine. In this case, you should set up a local cache, the three options being:
- Make disc contents available via HTTP: Download the images, then make their contents available to your LAN on a local mirror. The individual machines can use this mirror as if it were a regular Debian server. For example, if the contents of a CD are available under the URL http://10.0.0.1/cd1/, machines in the local network can use the packages from the CD with the following line in their /etc/apt/sources.list:deb http://10.0.0.1/cd1/ stable main contribA different URL and a separate entry in sources.list is necessary for each CD.
- Instruct your HTTP proxy to cache .deb files: Configure the proxy to keep .deb files for a long time, then set http_proxy in your environment on each machine to point at the cache, and use apt's HTTP acquisition method.This gives you most of the benefits of running a mirror, with none of the admin hassle. Since you can set limits on the proxy's disk usage, it works even for sites with limited disk space, and it has the advantage over mirroring that you only download those packages you install, which saves bandwidth. Squid can be told to keep the files by adding a line to /etc/squid/squid.conf:refresh_pattern debian.org/.*.deb$ 129600 100% 129600
- Set up a private Debian packages mirror: Beware that the Debian archive has grown to a tremendous size! Refer to the mirroring page for details.
Installing on a large number of machines can be tricky. Fully automatic installation (FAI), which is also available as a Debian package, may help you with this task.
I have a local Debian mirror and want to create my own CD/DVDs/BDs/. How do I do this?
Apart from a local Debian mirror, you also need plenty of disc space. The image creation scripts are packaged in the debian-cd package. However, it is usually a better idea to use the latest code from git. (Still, you should have a look at the package's dependencies to ensure you have all the necessary tools.)
To get the latest git version, make sure you have git installed. From an empty directory, give the following command:
git clone https://salsa.debian.org/images-team/debian-cd.git
Should you try to use the scripts, check the debian-cd mailing list archive for solutions to the questions that will inevitably show up. :-)
How do I become a mirror for Debian CD/DVD/BD images?
The necessary steps to set up your debian-cd image mirror and keep it up to date are described on a separate page.
Some Images are missing! Only the first n images are available! Where is the rest?
We don't store/serve the full set of ISO images for all architectures, to reduce the amount of space taken up on the mirrors. You can use the jigdo tool to recreate the missing ISO images instead.
www.debian.org
- Почему локальный диск с переполнен хотя там ничего не храниться
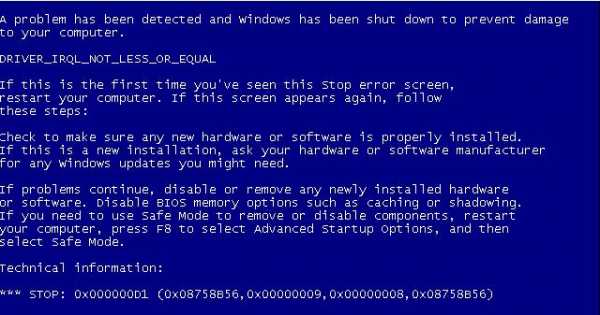
- Синий экран смерти 0x000000d1
- Что такое память пк
- В диспетчере устройств нет сетевого адаптера wifi
- Интернет скорость яндекс проверить
- Pci 1 шина
- Работа со скриптом

- Приложения какие есть

- Windows 10 выходное аудиоустройство не установлено
- Как папку защитить паролем
- Ctrl d и enter
